SaleMaker setup
Note: iPhone screens are shown below. iPad screens use a similar layout.
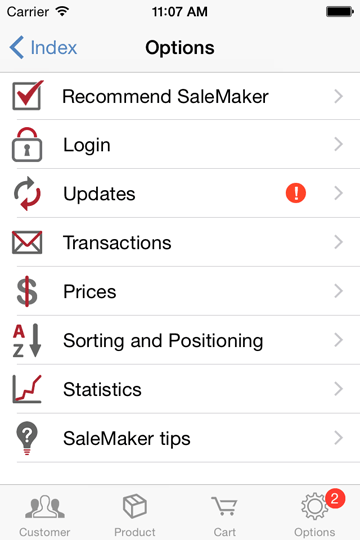
Options:
SaleMaker has many options, and comes ready to work with a sample company. The following screens are all accessed from the Options screen shown above. The exclamation mark indicates data is more than 24 hours old.
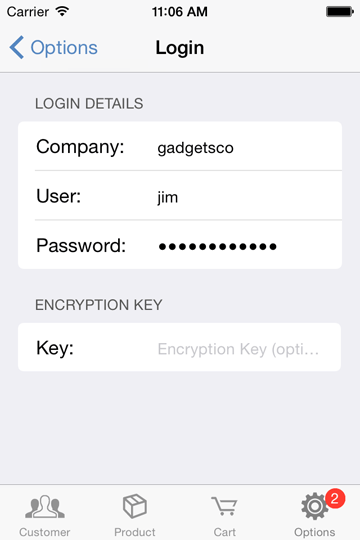
Login:
After registering, enter your company name, user name (sales rep code) and password and (optional) data encryption key. These details can be found in the user management section of the web site. This information is used every time you update the device's information.

Update Data:
Choose which files and product images should be retrieved. When ready tap 'Update Now'. If you have any problems, check your login details are correct. Your configuration is remembered, so you should rarely need to reconfigure your phone.

Transactions:
Orders and other transactions can be privately emailed to the recipient or uploaded to the Rephopper web site. Setup your office email address and optionally a second email address to send orders to. Select on/off to also send a copy of the order to the customer.
The administrator specifies uploading to the web, and can also override the 'to' email address.